Wednesday, August 11, 2010

Baked Series: Black Forest Chocolate Cookies (4 of 7)


Hey there!
This is post 4 of 7 of the Baked Series.
Halfway mark to the end of the week.!! Yay!
I’ll be doing seven posts this week (8/8 – 8/14) from the book

Baked-New Frontiers in Baking
by Matt Lewis and Renato Poliafito


Baking is my Zen will be having a
COOKBOOK GIVEAWAY
from August 8 through August 14, 2010.

The giveaway will be the ‘not yet released’ cookbook,
Baked Explorations: Classic American Desserts Reinvented
By Matt Lewis and Renato Poliafito

New book video teaser ~

Their book is due for release in October 2010. When it is available, the winner of the giveaway will receive a copy from…yours truly…Me.

In addition, you’ll receive a Baking is my Zen T-Shirt.

You’re probably asking, what are the rules to win this book?

Here are THE RULES for all seven posts (8/8 - 8/14):

• Contest starts on Sunday, 8/8/10 at 12a.m. EST.
• Contest ends on Tuesday, 8/17/10 at 11.59p.m. , EST.
• Winner announced on Wednesday, 8/18/10 by 5pm, EST.
• Find the WORD OF THE DAY within each post. Type it in the comment box as follows: Example: word of the day: bake
• You can post your comment daily in each post or all at once.(due by 8/17)
All seven posts must have a comment with the ‘word of the day’ indicated.
NOTE: THIS GIVEAWAY IS OPEN FOR U.S. ONLY.


To make it easy, I have the word of the day very visible for you. Remember, you need to type or copy and paste the word of the day (insert word) in the comment box.


This is EXACTLY how it is to appear in the comment box:
word of the day: dried cherries
 So, today’s word of the day: dried cherries


Here are a few bloggers who also made Black Forest Chocolate Cookies.
Check out their great blogs!

Accidental Hedonist


Taste and Tell


The Purple Foodie


Black Forest Chocolate Cookies
From the cookbook Baked-New Frontiers in Baking by Matt Lewis and Renato Poliafito
Adapted Recipe Photo Tutorial by Carmen of Baking is my Zen

Black Forest Cake is a classic German desert, often poorly translated in America into a lumpy mess of dry chocolate cake, super-sweet cherry preserves, and canned whipped cream.

A proper version of the cake includes chocolate cake layers, soaked in kirsch (cherry liqueur), lightly sweetened cherries, and freshly whipped cream. We interpreted the classic but kitschy cake with the respect. Our Black Forest Cookie is a very rich chocolate cookie tempered with a smattering of dried cherries and white chocolate chips. They are best served warm, with a slightly gooey center.

Yield: 24 cookies
3/4 cup all-purpose flour
1 teaspoon baking powder
1/2 teaspoon salt
16 ounces dark chocolate (60 to 72% cacao), coarsely chopped
10 tablespoons unsalted butter, cut into 1-inch pieces
6 large eggs
1 1/4 cups granulated sugar
1 cup firmly packed light brown sugar
1 tablespoon pure vanilla extract
1 cup (6 ounces) semisweet chocolate chips
1 cup (6 ounces) white chocolate chips
1 cup (6 ounces) dried cherries

1. Sift the flour, baking powder, and salt together into a medium bowl and set aside.

2. In a large nonreactive metal bowl, combine the dark chocolate and butter.

3. Set the bowl over a saucepan of simmering water and cook, stirring with a rubber spatula, until the chocolate and butter are completely melted and the mixture is smooth.

4. Set aside to cool.

5. In the bowl of an electric mixer fitted with the whisk attachment, beat the eggs and sugars on high speed until the mixture is pale and thick, about 5 minutes.

6. Add the cooled chocolate mixture and the vanilla and beat until just combined.

7. Scrape down the bowl and beat again for 10 seconds.

8. Add the flour mixture and mix on low until just combined, about 10 seconds. Do not overmix.

9. Using a spatula or wooden spoon, fold in the chocolate chips, white chocolate chips, and dried cherries. The dough will look very loose, but it will harden in the refrigerator.

10. Refrigerate for 6 hours or overnight.

BAKE COOKIES:

1. Preheat the oven to 375°F.

2. Line two baking sheets with parchment paper.

3. Drop the dough by rounded tablespoons onto the prepared baking sheets, about 1 inch apart.

4. Bake for 10 to 12 minutes, rotating the pans halfway through the baking time, until the tops of the cookies are set and begin to show a few cracks.

5. Remove from the oven and let cool slightly before removing from the pans and serving.

6. The cookies can be stored in an airtight container for up to 3 days.

Baked Note: The dried cherries are delicious in this cookie, but if you have a true, die-hard chocolate fan in your life, you can replace the dried cherries and white chocolate chips with regular semisweet chocolate chips.


Black Forest Chocolate Cookies - PHOTO TUTORIAL
Recipe Adapted By Carmen of Baking is my Zen

Put dried cherries in a cup. Add about one tablespoon of Kirsch. Allow to soak. Set aside.

Sift the flour, baking powder, and salt together into a medium bowl and set aside.

In a large nonreactive metal bowl, combine the dark chocolate and butter.

Set the bowl over a saucepan of simmering water and cook, stirring with a rubber spatula, until the chocolate and butter are completely melted and the mixture is smooth.

Set aside to cool.

In the bowl of an electric mixer fitted with the whisk attachment, beat the eggs and sugars on high speed until the mixture is pale and thick, about 5 minutes.

Add the vanilla and cooled chocolate mixture and beat until just combined.


Scrape down the bowl and beat again for 10 seconds.

Add the flour mixture and mix on low until just combined, about 10 seconds. Do not overmix.

Using a spatula or wooden spoon, fold in the chocolate chips, white chocolate chips, and dried cherries. The dough will look very loose, but it will harden in the refrigerator.
I used the block form of white chocolate instead of chips. Big mistake. It melted too much in the cookie. The chips were the better choice because they would have held their shape. (due to stabilizers in the chips). We live and learn!


Refrigerate for 6 hours or overnight.


BAKE COOKIES:

Preheat the oven to 375°F.

Line two baking sheets with parchment paper.

Drop the dough by rounded tablespoons onto the prepared baking sheets, about 1 inch apart.


Place 3 dried cherries on each cookie. (Have more cheeries (not soaked) on hand to add on top of the cookies)


Bake for 10 to 12 minutes, rotating the pans halfway through the baking time, until the tops of the cookies are set and begin to show a few cracks.

Remove from the oven and let cool slightly before removing from the pans and serving.

The cookies can be stored in an airtight container for up to 3 days.

Baked Note: The dried cherries are delicious in this cookie, but if you have a true, die-hard chocolate fan in your life, you can replace the dried cherries and white chocolate chips with regular semisweet chocolate chips.

NOTE: To be eligible for the Cookbook Giveaway, all 7 posts must have comments as indicated in the rules.


This is a fabulous cookie...my suggestion...it is best when served 'just baked'...


Peace in Baking,


Carmen


Baking is my Zen…sweet nibbles for the soul

Tuesday, August 10, 2010

Baked Series: Pumpkin Whoopie Pies (3 of 7)


Hi Everyone!
This is post 3 of 7 of the Baked Series.
I’ll be doing seven posts this week (8/8 – 8/14) from the book

by Matt Lewis and Renato Poliafito


Baking is my Zen will be having a
from August 8 through August 14, 2010.

The giveaway will be the ‘not yet released’ cookbook,
By Matt Lewis and Renato Poliafito


Their book is due for release in October 2010.
When it is available, the winner of the giveaway will receive a copy from…
yours truly…Me.

In addition, you’ll receive a Baking is my Zen T-Shirt.

You’re probably asking, what are the rules to win this book?

Here are THE RULES for all seven posts (8/8 - 8/14):

• Contest starts on Sunday, 8/8/10 at 12a.m. EST.
• Contest ends on Tuesday, 8/17/10 at 11.59p.m. , EST.
• Winner announced on Wednesday, 8/18/10 by 5pm, EST.
• Find the WORD OF THE DAY within each post. Type it in the comment box as follows: Example: word of the day: bake
• You can post your comment daily in each post or all at once.(due by 8/17)
• All seven posts must have a comment with the ‘word of the day’ indicated.
• NOTE: THIS GIVEAWAY IS OPEN FOR U.S. ONLY.


To make it easy, I have the word of the day very visible for you. Remember, you need to type or copy and paste the word of the day (insert word) in the comment box.

This is EXACTLY how it is to appear in the comment box:
word of the day: cream cheese

So, today’s word of the day: cream cheese

Here are a few bloggers who also made Pumpkin Whoopie Pies.
Check out their great blogs!


Pumpkin Whoopie Pies
From the cookbook Baked-New Frontiers in Baking by Matt Lewis and Renato Poliafito
Original Recipe shown below
Adapted Recipe Photo Tutorial by Carmen of Baking is my Zen


Try as we might, we were never huge fans of the traditional whoopie pie. We love the concept of two cakey chocolate cookies with a fair amount of cream sandwiched between them, but every execution we tried was always less than desirable. Maybe it was the cream filling with the shortening aftertaste. May be it was the too-wet cookie itself. After all, there is such a thing as being too moist. So we took some liberties with the whoopie pie and created our own version, which was named one of the top 100 tastes of 2007 by Time Out New York. Our Pumpkin Whoopie Pie makes the perfect midnight snack, with its soft, cakelike cookie and chilled cream cheese filling. For bite-sized pies, use a melon baller to scoop the dough.

Yield : 12 WHOOPIE PIES

INGREDIENTS:

For the pumpkin whoopie cookies
3 cups all-purpose flour
1 teaspoon salt
1 teaspoon baking powder
1 teaspoon baking soda
2 tablespoons cinnamon
1 tablespoon ginger
1 tablespoon cloves
2 cups firmly packed dark brown sugar
1 cup vegetable oil
3 cups chilled pumpkin puree
2 large eggs
1 teaspoon pure vanilla extract

For the cream cheese filling
3 cups confectioners’ sugar
½ cup (1 stick) unsalted butter, softened
8 ounces cream cheese, softened
1 teaspoon pure vanilla extract

DIRECTIONS:

MAKE THE PUMPKIN WHOOPIE COOKIES

1. Preheat the oven to 350 degrees F. Line two baking sheets with parchment paper.

2. In a large bowl, whisk the flour, salt, baking powder, baking soda, cinnamon, ginger, and cloves together and set aside.

3. In a separate bowl, whisk the brown sugar and oil together until combined.

4. Add the pumpkin puree and whisk to combine thoroughly.

5. Add the eggs and vanilla and whisk until combined.

6. Sprinkle the flour mixture over the pumpkin mixture and whisk until completely combined.

7. Use a small ice cream scoop with a release mechanism to drop heaping tablespoons of the dough onto the prepared baking sheets, about 1 inch apart.

8. Bake for 10 to 12 minutes, until the cookies are just starting to crack on top and a toothpick inserted into the center of a cookie comes out clean.

9. Remove from the oven and let the cookies cool completely on the pan while you make the filling.

MAKE THE CREAM CHEESE FILLING

1. Sift the confectioners’ sugar into a medium bowl and set aside.

2. In the bowl of an electric mixer fitted with the paddle attachment, beat the butter until it is completely smooth, with no visible lumps.

3. Add the cream cheese and beat until combined.

4. Add the confectioners’ sugar and vanilla and beat until smooth.

5. Be careful not to overbeat the filling, or it will lose structure.

6. (The filling can be made 1 day ahead. Cover the bowl tightly and put it in the refrigerator. Let the filling soften at room temperature before using.)

ASSEMBLE THE WHOOPIE PIES

1. Turn half of the cooled cookies upside down (flat side facing up).

2. Use an ice cream scoop or a tablespoon to drop a large dollop of filling onto the flat side of the cookie.

3. Place another cookie, flat side down, on top of the filling.

4. Press down slightly so that the filling spreads to the edges of the cookie.

5. Repeat until all the cookies are used.

6. Put the whoopie pies in the refrigerator for about 30 minutes to firm up before serving.

7. The whoopie pies will keep for up to 3 days, on a parchment-lined baking sheet covered with plastic wrap, in the refrigerator.

Baked Note
Make sure you chill the pumpkin puree thoroughly before making this recipe. The chilled puree will make your whoopies easier to scoop and give them a domed top.


Pumpkin Whoopie Pies – PHOTO TUTORIAL
by Carmen of Baking is my Zen

MAKE THE PUMPKIN WHOOPIE COOKIES

Preheat the oven to 350 degrees F. Line two baking sheets with parchment paper.

In a large bowl, whisk the flour, salt, baking powder, baking soda, cinnamon, 2 tablespoons pumpkin spice (my choice of spice) together and set aside.


In a separate bowl, whisk the brown sugar and oil together until combined.


Add the pumpkin puree and whisk to combine thoroughly.

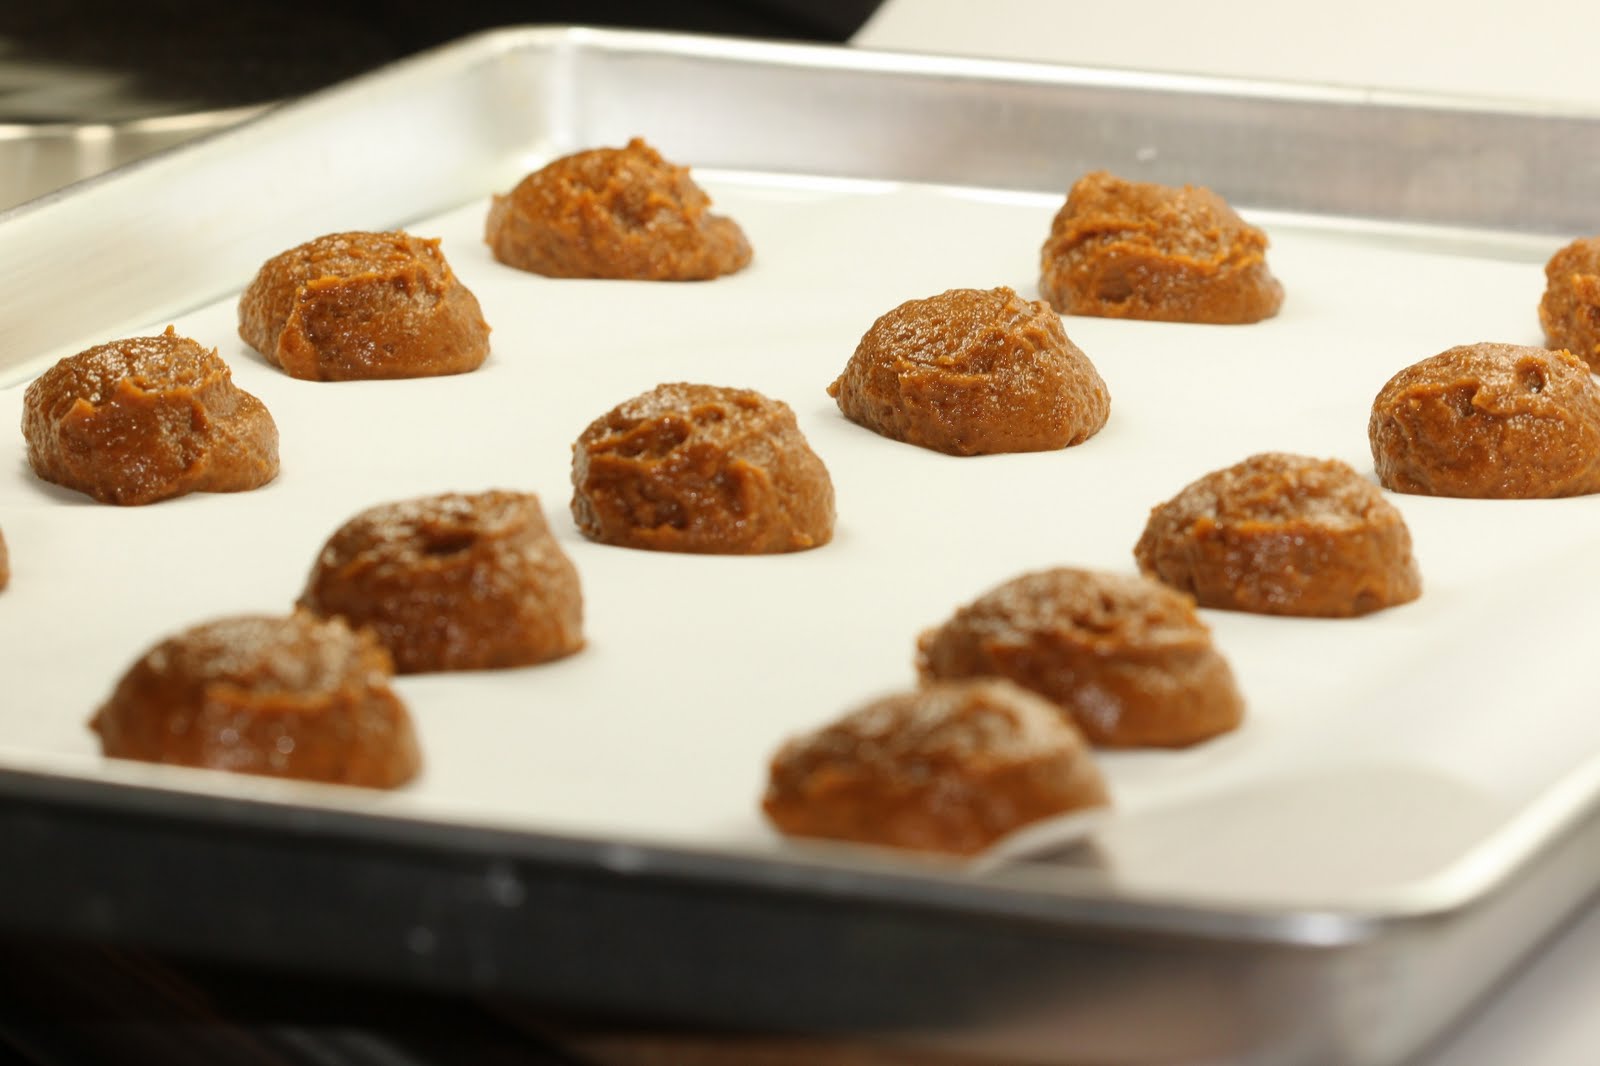
Add the eggs and vanilla and whisk until combined.

Sprinkle the flour mixture over the pumpkin mixture and whisk until completely combined.

Use a small ice cream scoop with a release mechanism to drop heaping tablespoons of the dough onto the prepared baking sheets, about 1 inch apart.


Bake for 10 to 12 minutes, until the cookies are just starting to crack on top and a toothpick inserted into the center of a cookie comes out clean.

Remove from the oven and let the cookies cool completely on the pan while you make the filling. I then transferred the cookies to a cookie rack.

MAKE THE CREAM CHEESE FILLING

Sift the confectioners’ sugar into a medium bowl and set aside.

In the bowl of an electric mixer fitted with the paddle attachment, beat the butter until it is completely smooth, with no visible lumps.

Add the cream cheese and beat until combined.

Add the confectioners’ sugar and vanilla and beat until smooth.

Be careful not to overbeat the filling, or it will lose structure.


(The filling can be made 1 day ahead. Cover the bowl tightly and put it in the refrigerator. Let the filling soften at room temperature before using.)

ASSEMBLE THE WHOOPIE PIES

Turn half of the cooled cookies upside down (flat side facing up).

Use an ice cream scoop or a tablespoon to drop a large dollop of filling onto the flat side of the cookie.


Place another cookie, flat side down, on top of the filling.

Press down slightly so that the filling spreads to the edges of the cookie.

Repeat until all the cookies are used.

Put the whoopie pies in the refrigerator for about 30 minutes to firm up before serving.

The whoopie pies will keep for up to 3 days, on a parchment-lined baking sheet covered with plastic wrap, in the refrigerator.

Baked Note
Make sure you chill the pumpkin puree thoroughly before making this recipe. The chilled puree will make your whoopies easier to scoop and give them a domed top.


NOTE: To be eligible for the Cookbook Giveaway, all 7 posts must have comments as indicated in the rules.


Peace in Baking,
Carmen
 
Baking is my Zen…sweet nibbles for the soul

DO NOT USE MY PHOTOGRAPHY WITHOUT PERMISSION

ALL PHOTOGRAPHY (UNLESS INDICATED) IN THIS BLOG BELONGS TO CARMEN ORTIZ OF BAKING IS MY ZEN.

PLEASE DO NOT USE MY PHOTOGRAPHY WITHOUT MY PERMISSION.

Thank You.

~ Carmen Ortiz - blogger (Baking is my Zen)